Showing posts with label home decor. Show all posts

Wednesday, April 3, 2013

Quilted Spring Table Runner

Now that you've had plenty of time to finish your beautiful spring placemats, here's what you can do with the scraps. Did I tell you how lovely your placemats were? Great job. :) Now let's make a table runner!

Quilted Spring Table Runner

Finished measurements: 20" x 14"
Seam allowance: 1/2" (unless otherwise stated)

materials
*scrap fabric pattern A
*scrap fabric pattern B
*solid-colored fabric
*coordinating colored thread

steps

1. Make sure your fabric is prewashed.

2. Cut solid-colored fabric to the following size specifications:
*5-1/4" x 15" (x2)
*1-1/2" x 15"
*21" x 15"

Make sure all pieces are pressed.

3. Cut both patterned fabrics into rectangles about 2-3" longer than what you need by anywhere from 3-7" wide. This pattern calls for 5" quilted stripes so I cut my rectangles about 7" x 5" (or so). There's really no exact science for this part as long as the pieces are long enough.
4. Take a fabric A rectangle and a fabric B rectangle and lay them on top of each other RS together at an angle. Stitch the long side of the top piece at 1/4". Press open.
5. Lay another rectangle on top of the one you just sewed RS together at an angle (you'll probably want the angle to be the opposite direction of the one you just made). Sew the long side of the new top piece at 1/4" and press open.
6. Now you'll keep doing this until your quilted strip is as long as you need it. If you're having trouble with the organized chaos of the angles of each piece, you can always place it at the angle you want (like above) and then fold it open to get an idea of what it will look like.
7. Now it's time to cut the strip to the correct size. This is where it really starts to come together. Using a straightedge, cut one side straight using the shortest piece of fabric as a guide (see picture). Then use the straightedge to cut the quilted strip to 5-1/2" wide.
8. Then comes the easy part of cutting it to the correct height of 15". Use your fabric as a guide, and just cut whichever side strikes your fancy; as long as it's 15" tall. Do this twice and you've got your 2 quilted strips! Now for the easy part.
9. Lay a quilted strip on top of a solid-colored piece (5-1/4" x 15") RS together. Stitch a long side at 1/4". Press open.

NOTE: When sewing the quilted piece on your sewing machine, make sure the folds are going under the presser foot backwards so they don't get bunched up under there.


10. Lay the skinny solid-colored piece (1-1/2" x 15") on top of the other side of the quilted strip you just sewed RS together. Stitch a long side at 1/4". Press open.

11. Lay the second quilted strip on top of the other side of the skinny solid-colored piece RS together. Stitch the long side at 1/4". Press open.
12. Lay a solid-colored piece (5-1/2" x 15") on top of the other side of the second quilted strip RS together. Stitch the long side at 1/4". Press open. Now you have the top of the runner done!

13. Lay the runner on top of the large solid-colored piece RS together. Stitch all around (1/2" seam allowance) leaving 2-3" for turning inside out.

14. Clip corners and turn inside out. Press.

15. Choose a color for the decorative stitching and stitch 1/4" all the way around the outside.

Since this piece isn't reversible (like the coordinating placemats), it doesn't really matter which color of the coordinating thread you choose for the stitching. I chose the blue because it popped more than the chartreuse.

16. "Stitch in the ditch" for both sides of both quilted strips (4 stitch lines).


And now you have a beautifully quilted table runner that will match either side of your reversible placemats. This was also my very first quilting project, and I have fallen in love with quilting! If this is going to be your first quilting project, you picked a good one. :)
Tuesday, April 2, 2013

Easy Spring Placemats

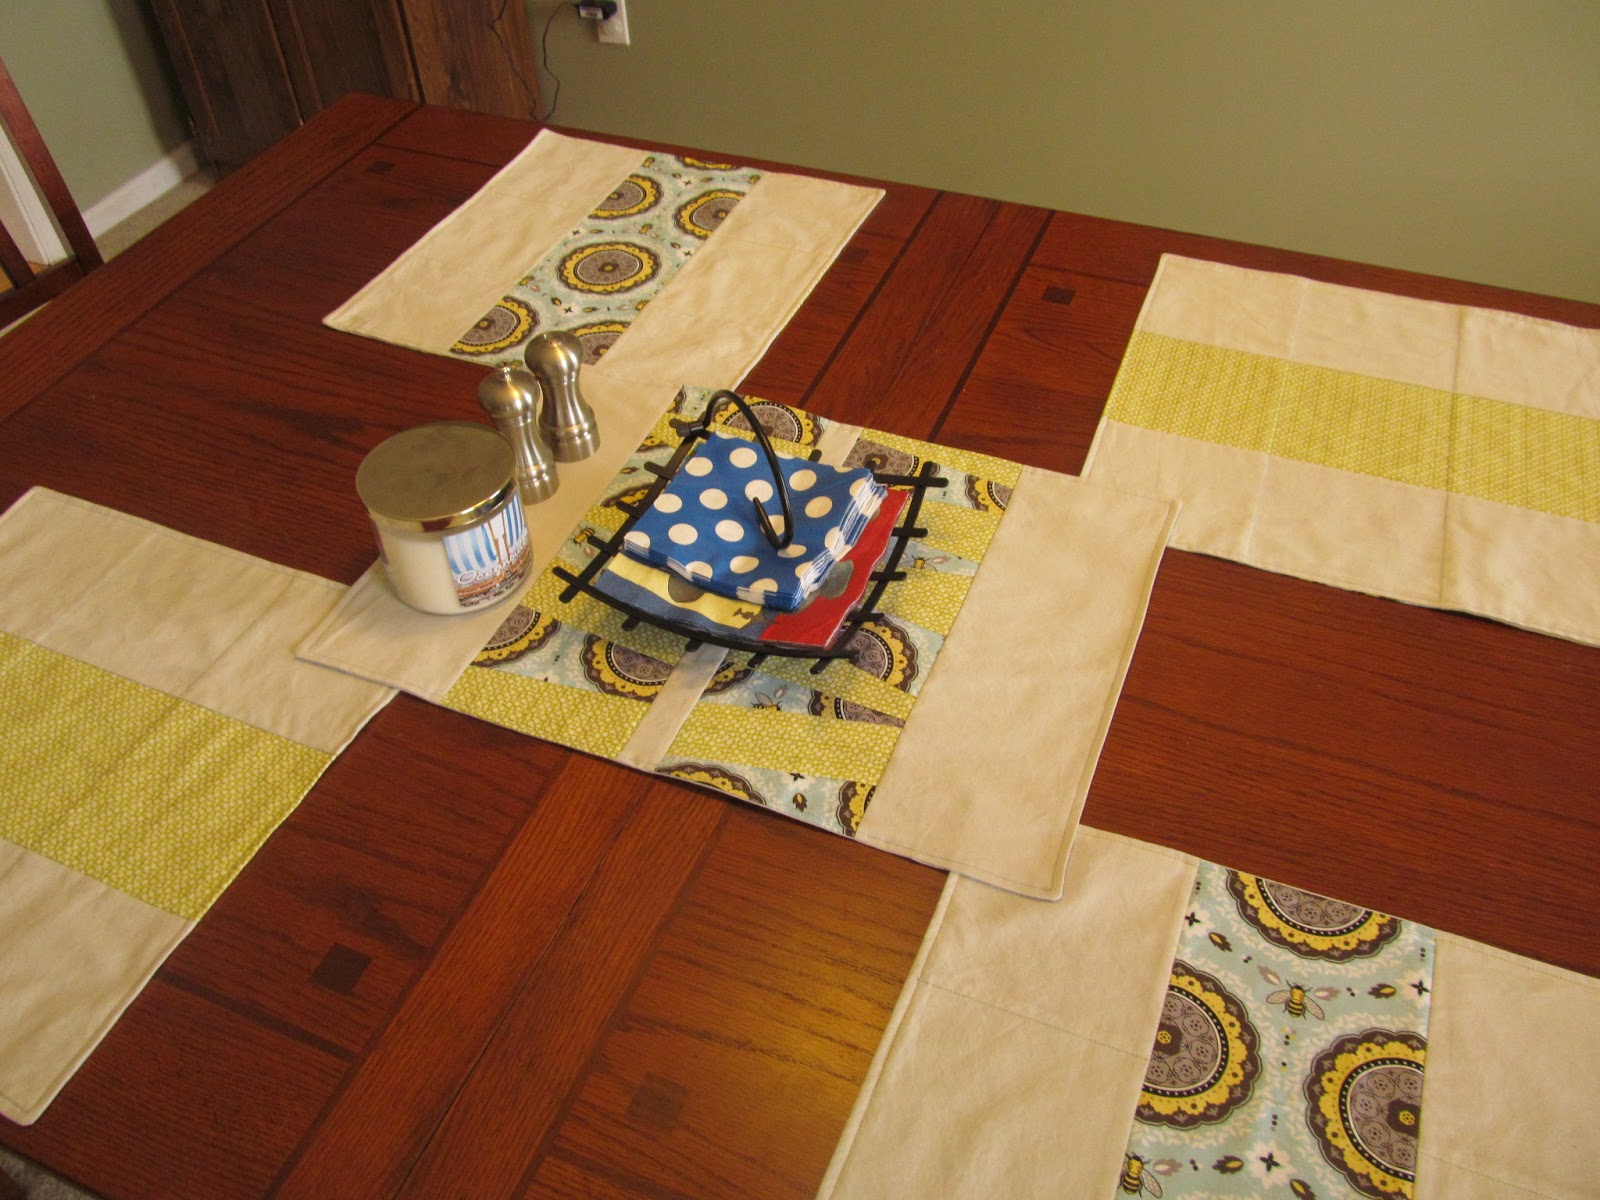
I have finally gotten tired enough of the weather where I am now trying to do everything in my power TO FORCE SPRING UPON US. I'm tired of this cold weather, already. So I found some beautiful springy fabric, made up a super easy sewing pattern, and I ended up with 4 reversible cheerfully spring placemats for our table. Yay!

Easy Spring Placemats (makes 4 placemats)

Finished measurements: 15" x 15"
Seam Allowance: 1/2" (unless otherwise stated)

 materials
*pattern fabric A:  6" x 16" (x4)
*pattern fabric B: 6" x 16" (x4)
*solid-colored fabric: 6" x 16" (x16)
*2 coordinating colored threads

steps

1.  Always prewash fabric!

2. Cut fabric to sizes specified in materials list. Make sure all pieces are pressed.

3. Lay down fabric A and a solid color RS together. Sew down one long side. Press open.

4. Lay down solid-colored fabric piece on top of previously sewn fabric A RS together. Sew down the other long side. Press open.
5. Follow steps 3-4 again for fabric B and the solid-colored fabric. Now you have 2 square pieces of sewn fabric.

6. Lay them down RS together with one of them turned 90° (so the patterned fabrics form a cross on top of each other). Sew all the edges leaving 2-3" for turning inside out.

7. Clip all corners, turn placemat inside out and press.

8. This is where it gets fun! I chose a chartreuse thread to show on the blue side and a blue thread to show on the chartreuse side for some decorative flair. With that in mind, I sewed 1/4" all around the edge to finish off the seam.

NOTE: When I was sewing with the chartreuse fabric facing up in my sewing machine, I had the blue thread in the top of my machine, and the chartreuse thread in the bobbin (so it shows up on the underside with the blue fabric). 
9. To finish it up, I "stitched in the ditch" on both sides, which created a 3x3 grid on each side of the placemat.

NOTE: When I was sewing with the chartreuse fabric facing up in my sewing machine, I had the blue thread in the top of my machine, and the chartreuse thread in the bobbin (so it shows up on the underside with the blue fabric). This means when I flipped the placemat over to "stitch in the ditch" on the other side, I had to switch the thread colors in the machine so chartreuse was on the top of the machine and blue was in the bobbin.

And now spring is starting to show up a bit. It's even warmed up outside! I'll take credit for that. :) Come back later for instructions on making the lovely quilted table runner in the center with the scraps! Happy Crafting!

Thursday, March 21, 2013

Giving New Life to Old Chairs

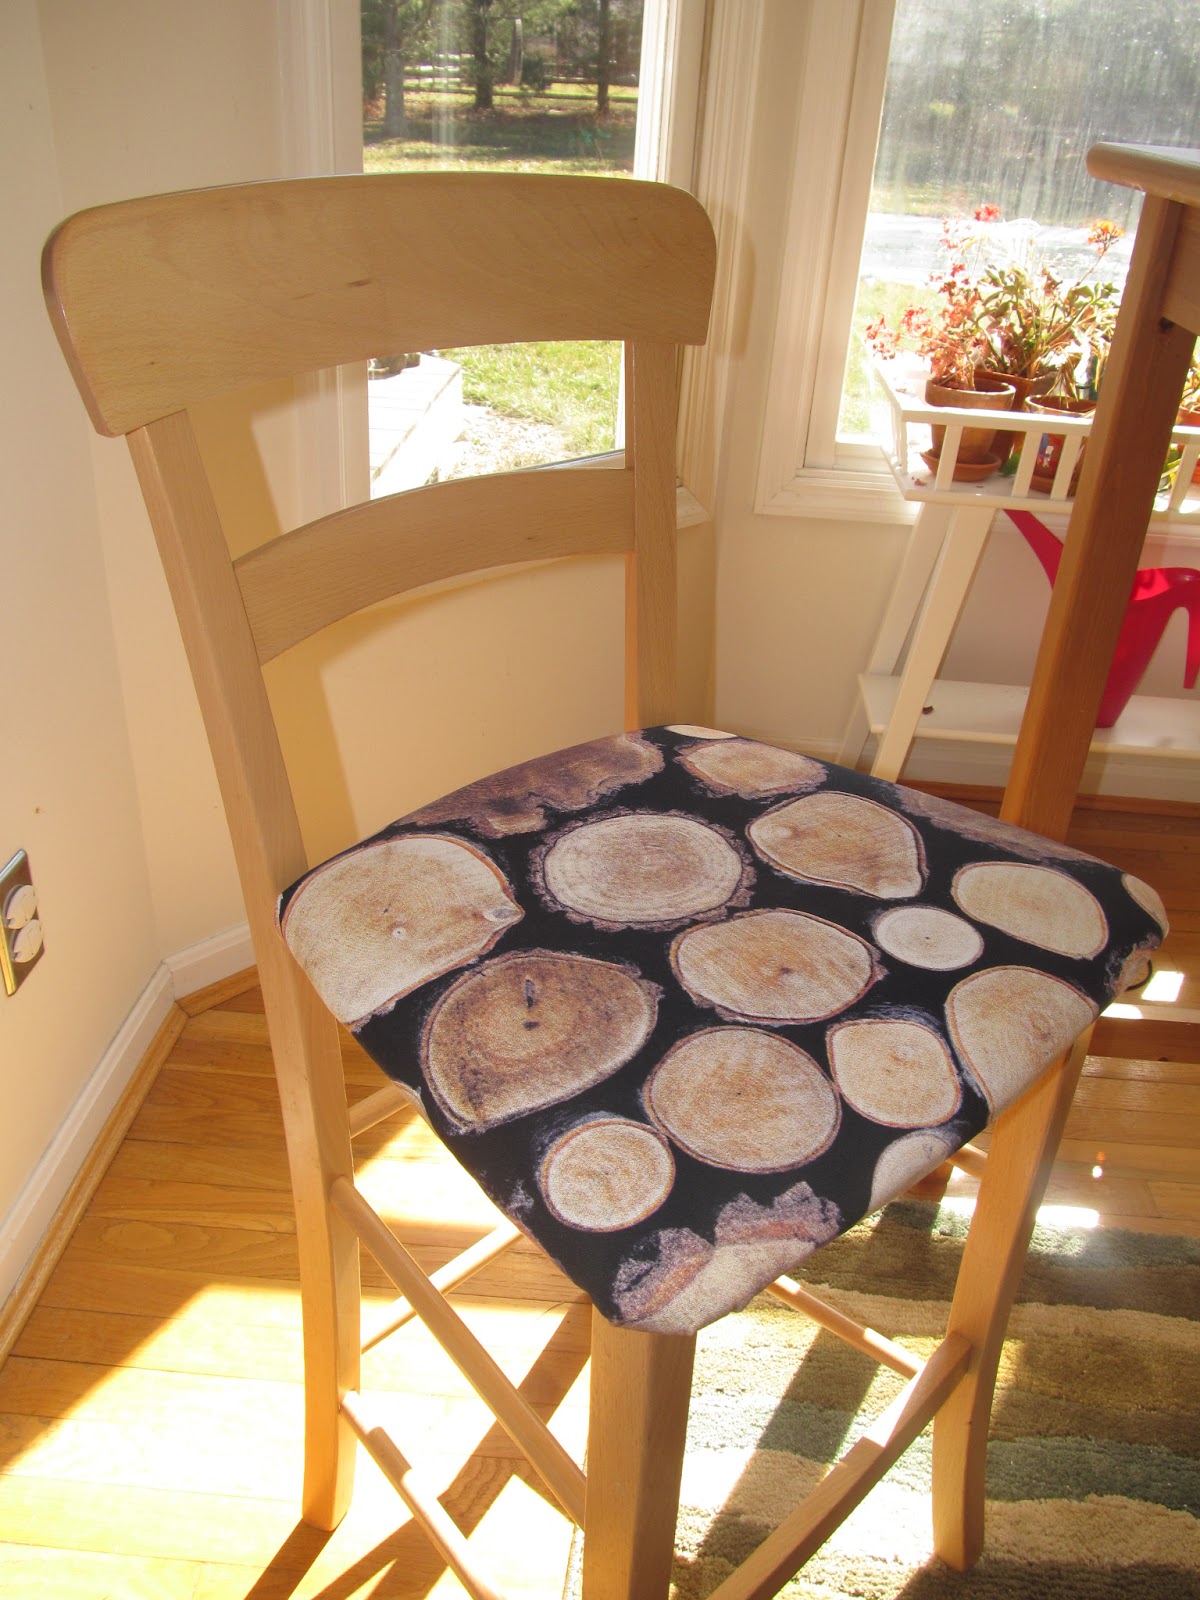
Dumpster chairs, even. Scott and I were moving out of our apartment and found these wonderful bar chairs just sitting by the dumpster on our way out. There was nothing wrong with them, and they were free. I'll take 'em! That was 7 years ago, and they're still going strong, especially with my latest project.
This was the poor state of them before this week. I bought a yard of home decor weight fabric (love this log cross section fabric!) from IKEA (always measure your surface; I have some extra for a fun project later...), and had some fabric stabilizer and a staple gun standing by.

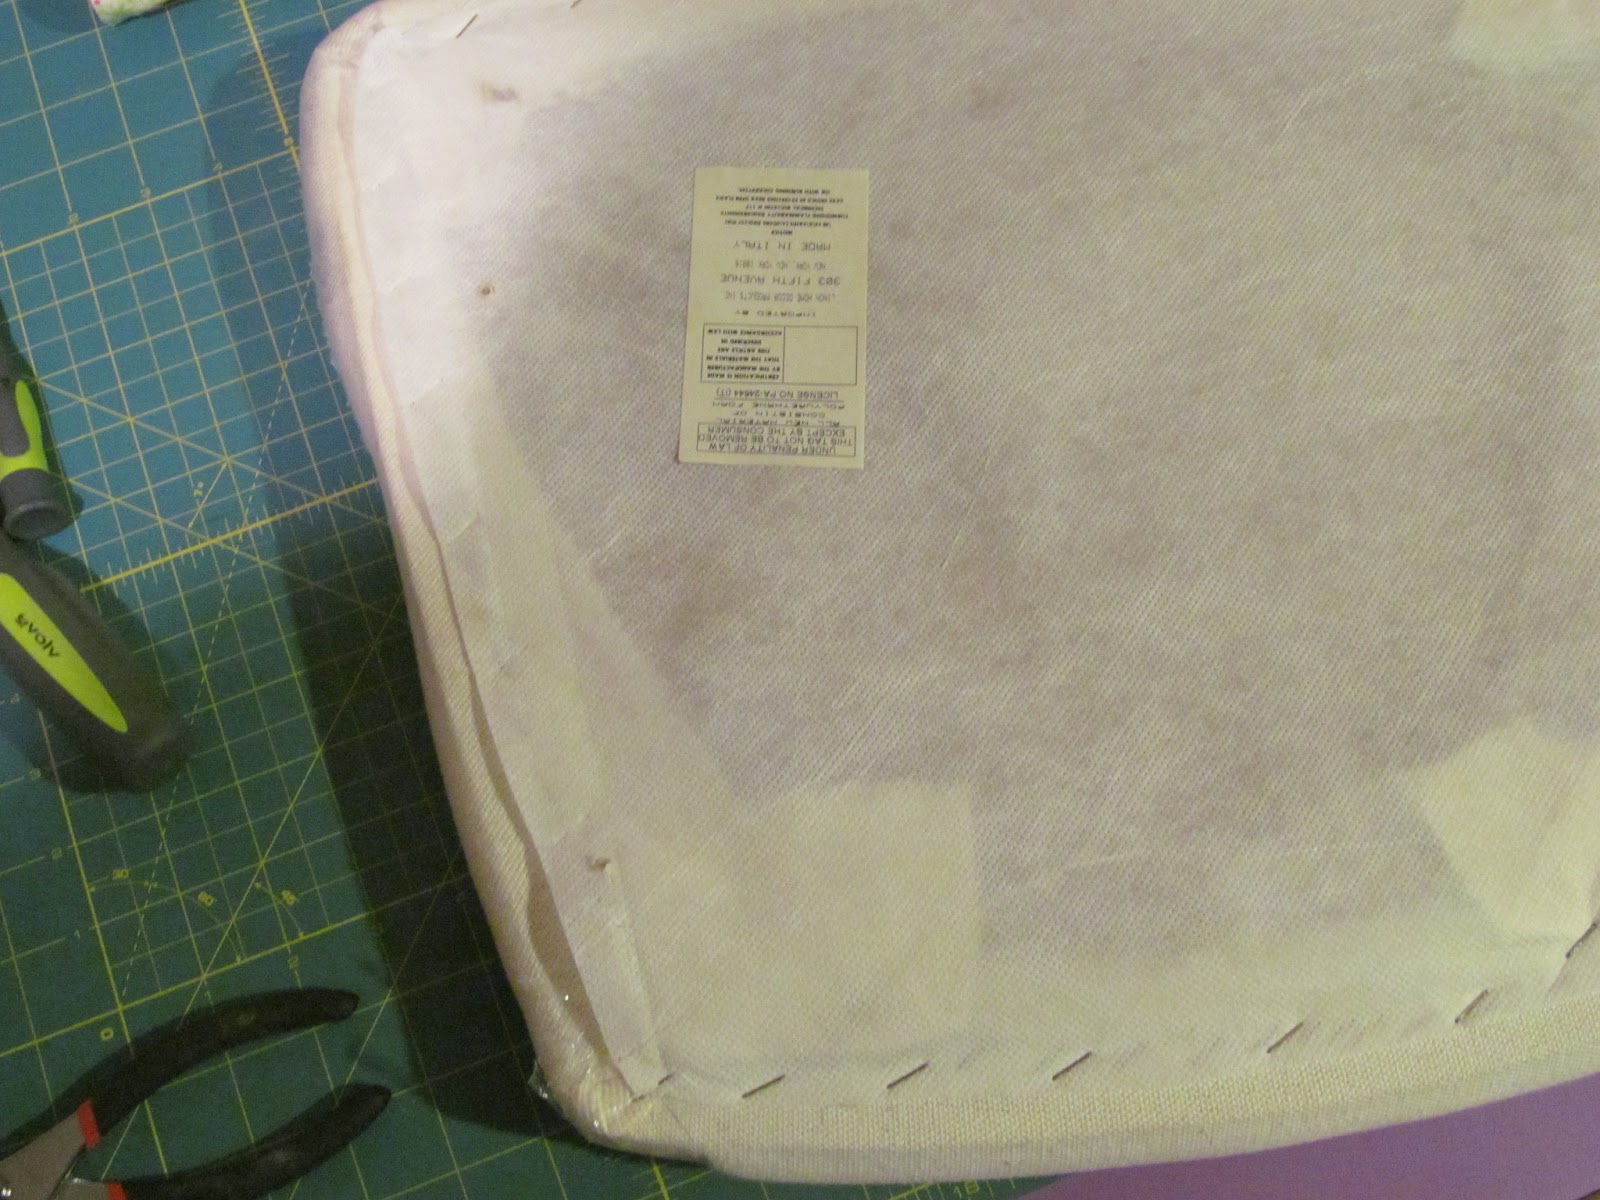
I started by detaching the seat from the frame and beginning the long task of removing the staples from the fabric.
It was a giant pain in the butt, but with a standard screwdriver and a pair of pliers, I was able to get it done. I kept the seat fabric to measure for the new seat. I ironed the old seat so it would lay flat for measuring and cutting. Now you can REALLY see why this needed to be done. :) Cut around the old seat, and you have your new one! You probably don't have to do this, but I'm kind of anal-retentive and want everything to be perfect so I did a quick blanket stitch around the outside of my new seat fabric to prevent fraying.
Luckily, my old seat's foam padding was just fine so I didn't have to replace that. Now I'm ready to staple the new fabric!
 I started at the back of the seat and started stapling from the middle. That way you can work in to the corners and get them the way you want them. I noticed when I was undoing the old seat fabric that there was a sort of plastic stabilizer so I decided to use some fabric stabilizer I had on hand. Just to keep the staples from pulling the fabric. It was around $7.99 for 10 yards, and I already had it. It seemed like a good idea. :)

I tried to work all 4 corners to be as flat as I could manage, and they all had extra stapling. It was more trial and error than anything. I had to take out staples a few times to rewrap. At this point, while you're wrapping, it might also be a good idea to mark the existing screw holes on your fabric so you don't staple them and so you know where they are for reattachment. I didn't mark them, but everything worked out fine.
When I was done wrapping the seat, I realized I didn't get enough fabric for the bottom cover. So... I decided to use the old seat fabric. :) I cut it using the old bottom as a template, and I, of course, had to do a little moving around to get it in a good spot that didn't have holes in it. I also turned it over so the side of the fabric that was facing out before was now to the inside of the seat. I also did a quick blanket stitch around this piece of fabric because it's more important that this one doesn't unravel and look unsightly. Then, staples all around, and voila!
Reattach it to the frame, and you're golden. Now we have our brand new old dumpster chairs. For the cost of free + $7.34 for the fabric, these chairs couldn't have been a better investment. :) Happy Crafting!

Saturday, March 16, 2013

I Have a New Work Table!

Yes! I have a brand new work table made by none other than my wonderful husband. He made it for me for my birthday, and it's finally been installed! It folds up against the wall for storage. Lucky for him, though, I don't EVER intend on folding it away. There will undoubtedly always be SOMETHING on it. :)
Here we have my lovely model, Joey showing off its wonderful table-ness. It holds things, like tupperware bowls, on its surface wonderfully. It is also a good place at which to sit. Scott painted it my favorite color (purple!), and, my personal favorite detail, added decorative exposed screw heads. Beautiful!
And here we have me in my usual crafting position. That is to say crouched over just asking for back pain but enjoying myself immensely! So here's to a wonderful husband who is incredibly talented in the work shop. In making me this wonderful crafting table, he has unknowingly added some more items to his work list. :) Happy Crafting... and Happy Birthday to me!


Monday, December 31, 2012

Encouraging Myself to Do the Laundry the First Day...

I have the curse of having a laundry room that is slightly out of the way (it used to be part of the garage), and I don't always hear the beepers when they go off signalling the laundry's done. Oh, yeah, and also I hate doing laundry. So there's that. In any case, it's impossible for me to do one load of laundry in a day, let alone the 3 or 4 or 5 that need to be done. So I made myself something pretty to try to encourage me to do the laundry when it's supposed to get done, as opposed to pulling clean clothes out of the dryer as we need them. :)
I bought myself a little wooden sign from Hobby Lobby and this very cute blue-washed wood-looking paper to decoupage onto the sign. The only problem was when I put the barn wood paper on top of the brand new wooden sign, the visuals didn't quite line up. So then I had to attempt to age the wooden sign. In one night. It's actually not that hard. :) Google has some pretty amazing information hidden away. It's like magic or something. I bought some steel wool and soaked it in about a half cup of white vinegar overnight. Then I brushed it on the wooden sign the next day, and, after 3 coats, voila! Instant aging. :) Maagiccccc...
It took a couple days to air out, but I was really happy with the result. After the decoupage with the barn wood paper, it actually looks like it was a barn wood sign. I added a cute 'launderette' sign, some ribbon and some stamps (I used Staz-On ink as it will literally stamp a permanent image onto anything), and I was mostly good to go. But I wanted something that I could see from the other side of the house that would tell me if I still had clothes in the dryer and I had to get my butt off the couch and go fold them. Enter the miner's coins.
I'm pretty sure we've all seen October Sky (as old as it is for a movie these days), and I've always loved the idea of those miner's coins that indicate which miners went underground for the day. I had some metal tag rings lying around so I found some icons for washer and dryer to hang in the middle of the rings. That way, I'll know if there are clothes in the washer or dryer (or both), and I can see these rings from across the house. You'd be amazed at how quickly I forget things. I need to remind myself of these things occasionally. :) So I just hang the washer coin on the sign when I put clothes in the washer and so on and so forth. I also made a little quickie pocket for the backside of the sign so I can store the coins there and they won't get lost when they're not in use.
I know it's not the prettiest thing you've ever seen, but it's the back of the sign, for Pete's sake. I also did some stamp testing there. No one's going to see it. :) So now I have this cute little sign that will tell me when to do the laundry. At least I'm pretty sure my husband's hoping his days of pulling clean clothes out of the dryer are over. :) Happy New Year!


Monday, September 3, 2012

Wrapping with Yarn

Now that our little girl is here, I can FINALLY reveal some of the artwork I'd been working on for her. If any of you had been following my pinterest account, I had become a bit obsessed with wrapped yarn letters. There's so much you can do with them as far as certain looks and styles, and they're a very unique addition to your decor.

After much trial and error (unfortunately, it's inevitable), I finally came up with something I liked. I started out by pulling a couple bobbins out of the skein of yarn I bought for the occasion. It was easier to wrap the letter with a more reasonably sized yarn ball. When I was searching for help with this project, I was surprised by the lack of instruction I found. They pretty much said keep practicing until you get something you like. Here are some of the techniques I found worked very well with this project. You will have to practice a lot to get the effect you like, though. Sorry for that.

I got my wooden letter at Joann's for maybe a couple dollars, and I've got yarn all over the house so that wasn't hard. Some other things you'll want are a hot glue gun and some assorted clamps to hold wrapped sections in place. First, I cut several small pieces of yarn to wrap around the end caps of the letter.
You'll be wrapping the yarn around the stalks of the letter so this will help cover those hard-to-wrap ends. Use the glue gun to tack these pieces of yarn in place. After way too much practicing, I finally figured I would try to wrap the letter in the way that it is written. I made a diagram I used to keep this in mind.
This is how I draw my Rs, and I found it worked very well as a guideline for wrapping the yarn around my letter. Of course, I also had to choose one of the hardest letters in the alphabet, but that just figures. From here, I just wrapped each letter stalk as indicated in my diagram, being sure to wrap about twice as much yarn very carefully (the yarn will tend to stack up on itself if you wrap it too much) where stalks met. Then you can use your glue gun to tack in place any yarn strands that are moving on you. I did all my tacking on the back of the letter because if will seep through the yarn and make it very hard and unpleasant-looking.

I also used some of my clamps to hold in place yarn sections as I was working on other pieces of the letter. You'll also see in this picture that you will be wrapping over the end caps you wrapped at the very beginning. I was actually able to wrap pretty far over the end caps by using my glue gun to tack yarn sections.

So, after much frustration, I was finally left with a project of which I was extremely proud. I wasn't able to reveal it before Miss Rosie came because we were keeping her name a secret, and this is for her bedroom door. Joey has a J on his, too, but I used paper to decoupage his. Also very fun and easy. :)
Of course, I also had to knit her a little rose that I attached to her letter. So now Miss Rosetta has her very own wrapped yarn letter for her door, and I am still trying to think of other projects where I can make wrapped yarn letters. It's really fun and pretty addictive. Good luck and happy crafting!

Sunday, July 22, 2012

Cornering the Market on Cheap Artwork

Apparently, I've gotten really picky in my home decor as I can't seem to find anything out there in this large mass-produced world that I like. I see things on etsy all the time that I like, but then it comes down to how much do I want to spend. I'm not necessarily saying I'm cheap, but, sometimes, those sellers are asking a LOT.

I recently found a saying I really like, and I couldn't find it just the way I wanted it. So I made my own. It didn't take any time at all as I was able to use an open source image editing program (GIMP 2) that's pert near Photoshop and some clip art. I also utilized one of my other favorite tools, 1001freefonts.com. I use this font website ALL THE TIME. They have the greatest typefaces, and the one I chose for this project was Sybil Green. I got the funky frame at Hobby Lobby for $7 since they were on sale for 50% off.
I put this in our kitchen since it's (our kitchen) severely lacking in personality. It has these weird soffits that hold these frames really well. I made these prints to fit in a 5" x 7" frame and printed them on high quality cardstock.

After putting this one up, there's another empty weird soffit right across the way from it. So I had to come up with another cute little saying. We drink a LOT of tea in our house, and it's kind of a religion so I came up with, "I Love You More than Tea" and added some cute clip art to go along with that.
I used all the same tools to make this one, the frames were still on sale at Hobby Lobby, and I'm sure it took a grand total of about 20 minutes in front of my computer to make these. And they're very personal to our family. If you see a cute little saying you like somewhere, don't be afraid to make your very own typographic artwork. Happy Crafting!

Tuesday, June 19, 2012

El Cheapo Artwork a la Rayna

As we are nearing the arrival of our second baby, we're trying our best to get her room ready and prepared just the way we want it. I'm not going to say I'm picky, I just have an idea of what I want, and that's usually what I want. I don't like to compromise a whole lot on that front if I don't have to. Artwork for her room has been a bit of a challenge in that regard so I decided to take it into my own hands. Enter: Rayna's Craft Tutorial #2.

El Cheapo Artwork a la Rayna

Supplies:
plywood backing for the corresponding paper size (3/8" thickness at least)
brayer
decoupage glue
foam brushes
cutting mat
artwork hanging hardware (I used the sawtooth hangers)
craft knife
pencil
hammer
desired scrapbook papers for artwork

1.) Make sure your plywood backing is the same size as the paper you're going to work with. If it isn't, cut the plywood backing to size. Note: I bought my plywood backing at Michael's where I was able to use a 40% off coupon and get 12" x 12" for the same size as my scrapbooking paper.

2.) If you wish, you can turn your paper right side down and lay the plywood backing on top of it so you can trace the outline of where you want it glued. I just kind of winged it, which also worked.

3.) Brush on a generous amount of glue onto the side of the plywood backing where you'll be gluing your scrapbook paper. This is the point at which you have to work pretty quickly...

4.) Lay your scrapbook paper on top of your gluey plywood board, get it in position as QUICKLY as possible, and then use the brayer to flatten it out and get out any air bubbles that may have appeared when you laid it down. Again, WORKING QUICKLY.


5.) When you're happy with the appearance of your artwork at this point (this is pretty much how it will look when you're done so keep that in mind), you can flip over the entire piece of artwork and lay it right side down on top of your cutting mat. If necessary, use your craft knife to trim the paper so it's flush with the sides of the plywood board.

6.) At this point, I ran my fingers around all 4 corners smoothing down cuts and wiping away excess glue. Then, I attached my hardware. I recommend getting a plywood board with at least a 3/8" thickness because that allows the nails to be pounded in without going through your artwork in the front. That would be bad. You can also get this kind of hardware (and several other different kinds of hanging hardware) at Michael's and use a coupon!

7.) Turn your artwork back around so the right side is facing upward, and, if desired, brush on another generous layer of the decoupage glue to kind of set and seal the paper artwork. It also adds a really cool vintage patina so it looks like you've had it forever. :) Make sure you get the glue around the edges of the paper so it won't start to peel up in the future. Also make sure to remove any excess glue.

Voila! Now you are done and can hang your lovely artwork anywhere in your house. People will wonder where you bought that beautiful piece!

I did two of them for our baby room and completely beat the price of anything we saw in the stores. We had seen some beautiful artwork at Target, but we didn't really want to pay $15 each for a set of 3.
This is what we did instead:
*plywood backing $2.50 (with coupon) (x2)
*scrapbooking paper $0.69 (x2)
*2 foam brushes  $1.99

And I already had everything else so I spent $8.37 for 2 very personalized pieces of artwork. I'm so proud of myself. So head on over to your local craft/scrapbooking store and go nuts. Happy Crafting!

Monday, June 18, 2012

Easy Peasy Valance for Dummies

I don't mean to offend anyone with this title. This just perfectly describes my relationship with sewing and making pretty things quickly and easily. I get bored pretty quickly so it's best if I can make something nice very easily. It has also struck me that this is my first tutorial. Yay! I'm very excited, and I'm sure something will go wrong, but this is a good one to start with. Again, easy.

So our house has these ugly, old, dirty venetian blinds that we never use in certain windows, e.g. our kitchen window above the sink (a). They're the windows that we never cover because they let in awesome light during the day. I tried taking down those ugly venetian blinds and found that underneath them it was even uglier (b). So I had to come up with something to cover them up because there was NO WAY I was going to continue looking at those stupid, ugly venetian blinds just because it was uglier to remove them.


Easy Peasy Valance for Dummies

fabric cut to window (width inside trim + 2in) and (desired height + 4in)
coordinating sewing thread
1" x 2" batten (cut to finished width of window)
(2) 1-1/2" L brackets
staple gun
power drill
tape measure (not pictured)
1.) The first thing I did was cut my fabric to the appropriate size. I added 2 inches to the width and 4 inches to the height. I found it was helpful to label the top and bottom of my fabric so I didn't get confused later. Trust me, it happens.

2.) Stitch a zigzag stitch (or serge, if your machine does that) all the way around the piece to lock in the threads.

3.) Fold and pin both the left and right sides of your fabric in 1 inch on the wrong side. Sew a 3/4 inch seam allowance in a coordinating thread color.

4.) Fold and pin the bottom of your fabric in 1 inch on the wrong side. Sew a 3/4 inch seam allowance in a coordinating color.

And you're done sewing! Wasn't that easy? Now we're going to work on hanging and installing your valance.

5.) Cut your batten down to size. I like to make it about 1/4 inch shorter than the width of my finished valance just so it tucks inside the fabric nicely.

6.) Lay the batten down (with the 2 inch surface down) on a secure surface. Align your completed valance right side up on top of the upward-facing 2 inch surface of the batten (a). Ensure the edges are lined up evenly with the edges of your batten and the top edge of the valance is even with the top edge of the batten. Staple your valance to the batten (b).

7.) Fold your valance over the batten so you are looking at a finished valance with the staples in the back. Lay the valance assembly right side down and measure about 5 inches in from each side of the batten to screw in your L brackets for installation. I always make sure the top of the L brackets go above the batten just a bit so there's extra room for installing it to the inside of the window trim.

8.) Now all that's left to do is install your valance inside your window trim and make sure it's level and even. Or at least as level and even as you want it. :) Just a side note: you CANNOT see the wooden batten from the outside. I checked.


And you're done! Now you can (and should) admire your beautiful handiwork.

Here's another one I did in our breakfast nook. The sunlight's amazing in there, and we NEVER put the curtains (or the blinds previously) down. I also made roman shades out of this same fabric for the other 2 windows in the breakfast nook, but that's a whole different can of worms and a subject for a later date. Happy Crafting!