I have ALWAYS wanted to use chalkboard paint. I see it on the DIY network, Martha Stewart crafting ads (I get her craft a day newsletter) and in various Michael's or JoAnn's crafting project ideas. So now it's my turn! Unfortunately, I did not end up getting Martha Stewart's chalkboard paint as it was 2 ounces fewer for $1 more. I got the folkart brand (a very well-known acrylic paint brand), and it worked just fine. I imagine there's only so much that can go wrong with paint so I didn't even think about it. Anyway... on to the project!
We have some baking ingredient jars on our counter, and they needed a little jazzing up. Plus, I always have to look really closely to distinguish the flour and sugar. It sounds stupid, but it's a problem for me. I'm blind as a bat. I bought some pre-cut balsa wood circles (3.25" diameter) for $0.29 each to fit the lids of my kitchen jars. I got my chalkboard paint for $6.99. I used contact paper to mask off a slightly smaller circle in the middle of each balsa piece, and then I just painted 6 or 7 coats of the chalkboard paint. The balsa really soaked up that paint so it took a couple days for me to get all my coats on. I adhered each circle to the lid with 3-D glue dots so they can be
removed (if necessary, but they probably won't) but the intention is for
them to stay there forever. I like to plan my options.
This was a really quick and easy project that you could do for any room. I painted a couple extra chalkboard labels to use in my craft room. Now I can change out the contents of each jar, or, as is the case with my granola (maple pecan here... yum...), I can get different flavors. And I will never mistake the flour for the sugar again.
Now... how else can I use my chalkboard paint...?
Wednesday, March 20, 2013
Monday, March 18, 2013
Joey's New Bedsheets
I have finally finished that poor boy's sheets. He's had the same 2 sets of bedsheets for over 3 years, but no more! I thought, "Hey, how hard could it possibly be to make a sheet. It's a flat piece of fabric with some corners in it." It turns out, it wasn't that hard, it was just kind of a pain in the butt. The great part about the process, though, was that I got to take Joey to the store with me so he could pick out whatever pattern he wanted. We both had a good time with this part.
The first set of sheets I made was made from some Cars fabric Joey picked out. If you missed it the first time, the pillowcase pattern can be found elsewhere on my blog HERE. Super easy stuff, and it took me about 20 minutes to make.
The second set of sheets we made (I say we because he's a very good helper and would want credit, I'm sure), was made from some dump truck fabric he picked. Now, I couldn't stand to make an entire bedsheet out of the super busy dump truck pattern so I made the pillowcase using the dump truck fabric and picked out a coordinating fabric for the actual bedsheet. You'll see what I mean in a second. I made this pillowcase the exact same way with the exception of the added grosgrain ribbon embellishment. I took that out and used some decorative stitching on the outer hem to have a little fun with my new sewing machine. :)
You can't see it very well in this picture, but the bedsheet is a fabric with all sizes of grey circles. I thought it looked like rocks all piled up, and it goes really well with his pillowcase. And also, he's a hammy turkey. :)
So, now to get down to business! The pattern I used for the bedsheet can be found HERE. The guys at Michael Miller Fabrics did an amazing job with this pattern as it was very easy to read and complete. I did, however, need to make some changes to suit my own needs. For Joey's bedsheet (please be sure to measure your mattress!), I had to add 2" to the length. On the other hand of that, the pattern calls for 45" in fabric width, and I did just fine with 42". I couldn't find anything at JoAnn's that had 45" length.
I also decided to use 3/8" elastic as the 1/4" they suggest looked way to flimsy when I went to buy it in the store. I wanted a little extra strength assurance. That also changed the hemming measurements: I folded the hem over a full 1" and then folded back under 1/4" (same in the pattern) in order to fit the wider elastic. It is always suggested that you leave 1/4" on each side of your elastic track. So if your elastic is 3/8" wide, you need a track that is 7/8" wide. I was short about an 1/8", but with my bodkin and my super-savvy threading skills, it worked just fine.
I always encourage you to make your decor your own, and this is a really easy way to do it. Don't let it intimidate you! I do get a little overwhelmed by my crafts sometimes, but, if I just sit down and do it, everything works out just fine. And if it doesn't, you can always give it as a gift. ;) I'm looking forward to getting to make Rosie's sheets when hers start to get old. :) Happy Crafting!
The first set of sheets I made was made from some Cars fabric Joey picked out. If you missed it the first time, the pillowcase pattern can be found elsewhere on my blog HERE. Super easy stuff, and it took me about 20 minutes to make.
The second set of sheets we made (I say we because he's a very good helper and would want credit, I'm sure), was made from some dump truck fabric he picked. Now, I couldn't stand to make an entire bedsheet out of the super busy dump truck pattern so I made the pillowcase using the dump truck fabric and picked out a coordinating fabric for the actual bedsheet. You'll see what I mean in a second. I made this pillowcase the exact same way with the exception of the added grosgrain ribbon embellishment. I took that out and used some decorative stitching on the outer hem to have a little fun with my new sewing machine. :)
You can't see it very well in this picture, but the bedsheet is a fabric with all sizes of grey circles. I thought it looked like rocks all piled up, and it goes really well with his pillowcase. And also, he's a hammy turkey. :)
So, now to get down to business! The pattern I used for the bedsheet can be found HERE. The guys at Michael Miller Fabrics did an amazing job with this pattern as it was very easy to read and complete. I did, however, need to make some changes to suit my own needs. For Joey's bedsheet (please be sure to measure your mattress!), I had to add 2" to the length. On the other hand of that, the pattern calls for 45" in fabric width, and I did just fine with 42". I couldn't find anything at JoAnn's that had 45" length.
I also decided to use 3/8" elastic as the 1/4" they suggest looked way to flimsy when I went to buy it in the store. I wanted a little extra strength assurance. That also changed the hemming measurements: I folded the hem over a full 1" and then folded back under 1/4" (same in the pattern) in order to fit the wider elastic. It is always suggested that you leave 1/4" on each side of your elastic track. So if your elastic is 3/8" wide, you need a track that is 7/8" wide. I was short about an 1/8", but with my bodkin and my super-savvy threading skills, it worked just fine.
I always encourage you to make your decor your own, and this is a really easy way to do it. Don't let it intimidate you! I do get a little overwhelmed by my crafts sometimes, but, if I just sit down and do it, everything works out just fine. And if it doesn't, you can always give it as a gift. ;) I'm looking forward to getting to make Rosie's sheets when hers start to get old. :) Happy Crafting!
Saturday, March 16, 2013
I Have a New Work Table!
Yes! I have a brand new work table made by none other than my wonderful husband. He made it for me for my birthday, and it's finally been installed! It folds up against the wall for storage. Lucky for him, though, I don't EVER intend on folding it away. There will undoubtedly always be SOMETHING on it. :)
Here we have my lovely model, Joey showing off its wonderful table-ness. It holds things, like tupperware bowls, on its surface wonderfully. It is also a good place at which to sit. Scott painted it my favorite color (purple!), and, my personal favorite detail, added decorative exposed screw heads. Beautiful!
And here we have me in my usual crafting position. That is to say crouched over just asking for back pain but enjoying myself immensely! So here's to a wonderful husband who is incredibly talented in the work shop. In making me this wonderful crafting table, he has unknowingly added some more items to his work list. :) Happy Crafting... and Happy Birthday to me!
Here we have my lovely model, Joey showing off its wonderful table-ness. It holds things, like tupperware bowls, on its surface wonderfully. It is also a good place at which to sit. Scott painted it my favorite color (purple!), and, my personal favorite detail, added decorative exposed screw heads. Beautiful!
And here we have me in my usual crafting position. That is to say crouched over just asking for back pain but enjoying myself immensely! So here's to a wonderful husband who is incredibly talented in the work shop. In making me this wonderful crafting table, he has unknowingly added some more items to his work list. :) Happy Crafting... and Happy Birthday to me!
Labels:
crafting,
crafting table,
diy,
furniture,
home decor,
paint,
papercrafting,
table,
woodworking,
workspace
Monday, January 28, 2013
Update Your Mangy Ironing Board
How do these things get so dirty, anyway? I've never ironed anything but clean clothes. Anyway, here's a nice easy, maybe a little dirty, tutorial for you to use when you'd like a little change on the ironing board.
Ironing Board Cover Tutorial
Materials:
* Measure your ironing board to get an idea of how much fabric you'll need. Mine is 56" long so I just got 2 yds.
*1/8" cord
*toggles for the cord
*coordinating thread
*ruler
*water soluble pen
Remember to always wash your fabric before sewing.
1. Remove current board cover and inspect underlayment to make sure it’s still usable. If it’s not, you’ll have to get something to replace it. Mine was foam, and it's fine. Awesome.
2. Lay fabric down on top of your ironing board facedown making sure to leave a few inches around the edge of the fabric. Trace around the ironing board with your marker.
- If you wanted to make a paper pattern that you could use whenever you wanted, you could do that, too. The following steps will be the same, you'll just use paper.
5. Place the fabric right side down. Mark in at ¾”. Mark in and pin/press at ¼”.
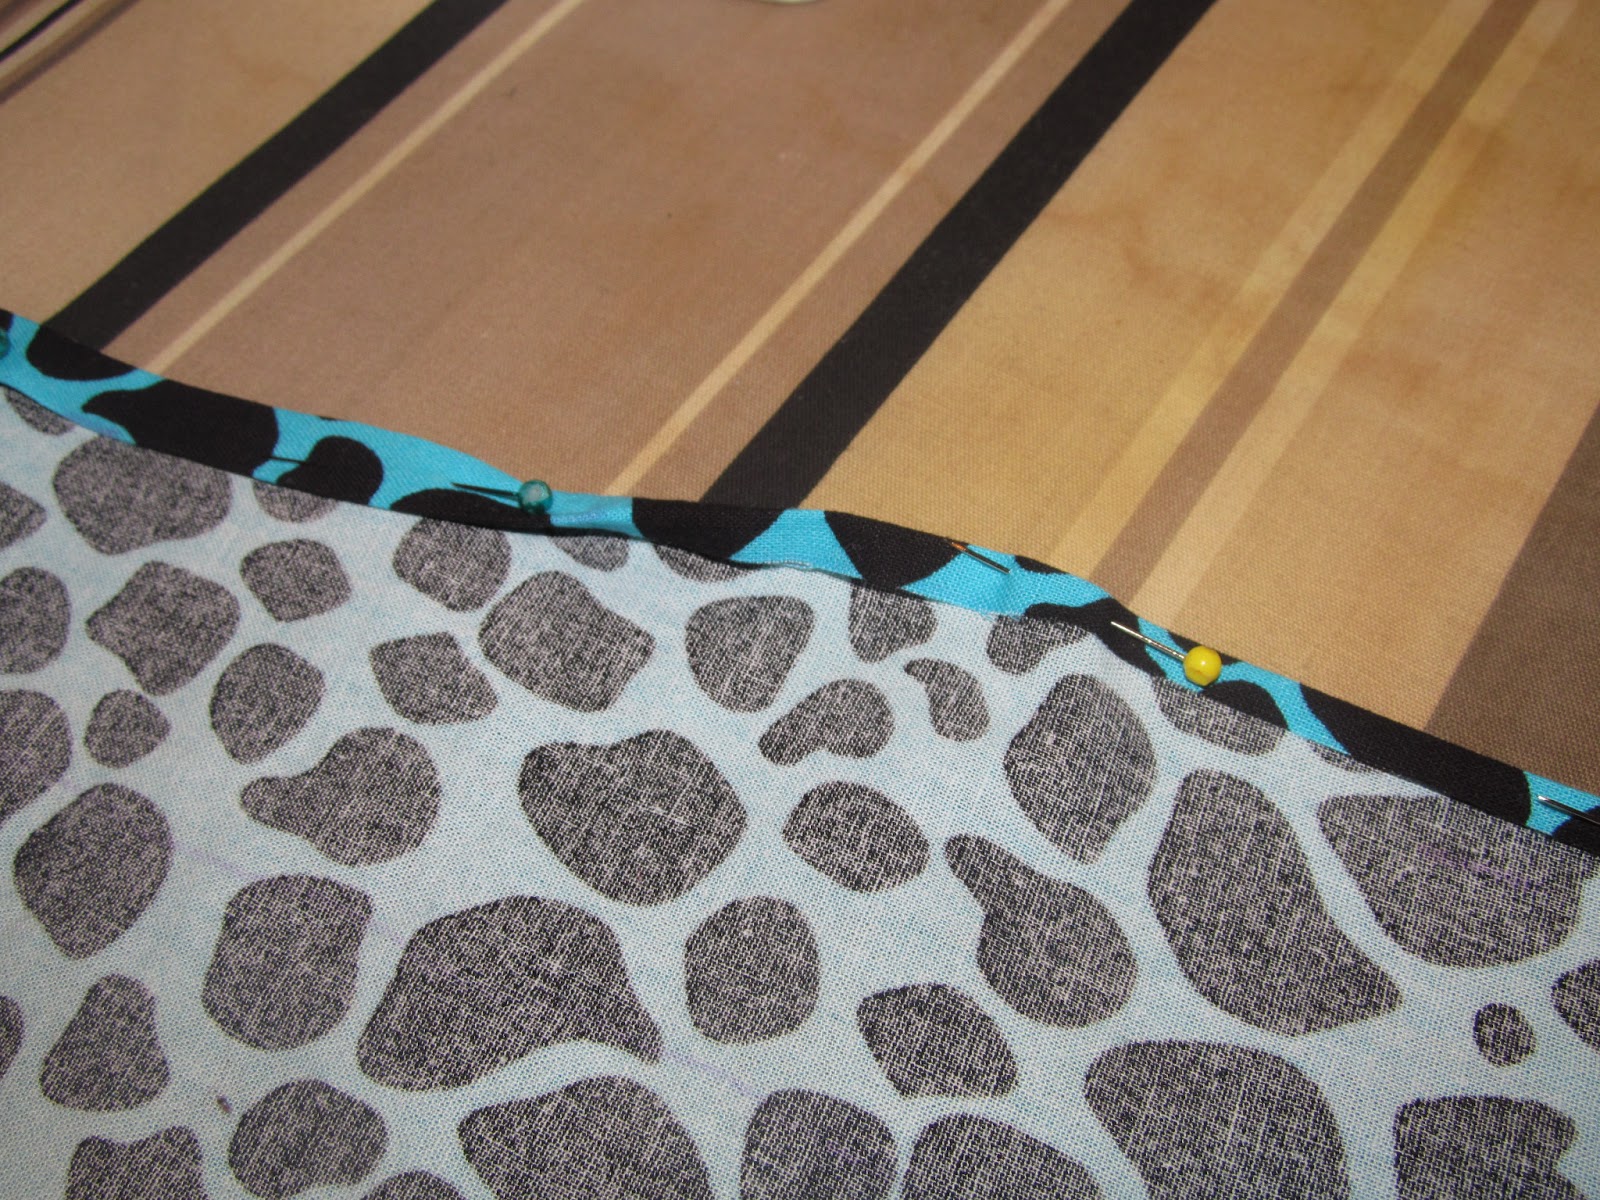
6. Pin/press again at the marks you made at ¾”. Yes, you will have some gathers around the corners, but just press them down (hospital corner style) and sew right on top of them.
- You can see where I've already pressed and pinned the 1/4" section (on the right side of the photo). Then I went back and folded the fabric again to the 3/4" marks (on the left side of the photo).
8. Sew as close to the inside pressed hem as possible. I always like to press my hems when I'm done so they look nice so you can do that, if you'd like.
9. Attach a safety pin (or elastic threader) to the end of your allotted cord length and thread it through the casing where you left your opening. Make sure you’re threading the cord through the casing entirely. That probably means you’ll have to go back and straighten out the fabric where’s it's bunched up because of the cord going through it. This will make it easier to tighten it at the end.
10. Put your cover on your ironing board and pull the cord tight making sure the cover surrounds the board on all sides evenly so you don’t have any weird bunches or wrinkles.
11. Thread the toggle on the exposed cord on the end and tighten it to bring the cover very close up around the board.
12. Step back and admire. Maybe have a drink. Mmmm... drinking and sewing...
Everyone needs some teal giraffe print in their lives. Happy Crafting!
Sunday, January 20, 2013
Easy Toddler Pillowcase
I welcome you to Joey's first pillowcase tutorial! We figured he was old enough to have his own pillow, and I wanted to encourage him to welcome the change (he's NOT good with change) by having him pick his own pillow fabric. Fun, right?
Easy Toddler Pillowcase (14" x 20" pillow insert)
*Fabric of your choice (I bought 1 yard, but you could get away with 1/2 provided you'll be doing a cuff also)
*ribbon or extra fabric for embellishment
*coordinating fabric for the cuff
*coordinating thread
Seam allowances: 1/2" unless otherwise stated.
1. Prewash and iron the fabric. This will make it easier to work with.
2. Cut the fabric. This is ALWAYS my least favorite part...
4. Then, I folded in and ironed my 1/2" hem on the short side of the case fabric and pinned the cuff fabric right underneath it but only as far in as the 1/2" seam. Sew as close to the edge of the case fabric as you can get. Then, I sewed a second seam 1/4" away from that one.
6. Now you can turn it right side out and press all your seams.
8. You can use whatever color thread you like, but I chose a contrasting red color to bring in more of the color of the case fabric. Sew at 5/8" and then again at 7/8" for a nice look.
9. Press one more time, admire your work and you're done!
For now, we'll be building Cars-themed fluffy pillow forts and sleeping comfortably.
Easy Toddler Pillowcase (14" x 20" pillow insert)
*Fabric of your choice (I bought 1 yard, but you could get away with 1/2 provided you'll be doing a cuff also)
*ribbon or extra fabric for embellishment
*coordinating fabric for the cuff
*coordinating thread
Seam allowances: 1/2" unless otherwise stated.
1. Prewash and iron the fabric. This will make it easier to work with.
2. Cut the fabric. This is ALWAYS my least favorite part...
- Case: 32" x 15-1/2" (you'll be folding this in half to cover the pillow)
- Cuff: (2) 15-1/2" x 7"
- embellishment: (2) 15-1/2" x 7" (I used 3/4" grosgrain ribbon)
4. Then, I folded in and ironed my 1/2" hem on the short side of the case fabric and pinned the cuff fabric right underneath it but only as far in as the 1/2" seam. Sew as close to the edge of the case fabric as you can get. Then, I sewed a second seam 1/4" away from that one.
- So you see, I have the case fabric on top (right side up) with the cuff fabric (also right side up) and basted ribbon underneath at the 1/2" seam line.
6. Now you can turn it right side out and press all your seams.
- It looks really nice when you fold the fabric in half instead of sewing those 3 sides.
8. You can use whatever color thread you like, but I chose a contrasting red color to bring in more of the color of the case fabric. Sew at 5/8" and then again at 7/8" for a nice look.
9. Press one more time, admire your work and you're done!
- The contrasting color thread on the black cuff looks really neat!
For now, we'll be building Cars-themed fluffy pillow forts and sleeping comfortably.
Labels:
baby bedding,
baby decor,
bedding,
cars,
diy,
lightning mcqueen,
miy,
pillow,
pillowcase,
sewing,
toddler bedding
Wednesday, January 16, 2013
Using Our Powers for Good
There are some days when I swear the world has gone completely bonkers. This time, when the unthinkable happened in a tiny little town that could have been home to any one of us, a band of crafters came together to try and help those affected by the tragedy. While there's never really anything you can do to truly comfort someone in this situation (I can't even bring myself to type it), we can't just sit by and watch them in pain, either. Enter 600 Monsters Strong and their campaign to bring cuddly stuffies to children all over the country who have been affected by gun violence.
There were a few guidelines for crafting, some of which I wouldn't even have thought of. For example, no x's for eyes. It totally makes sense when you think of it in context, but it's such a common crafting technique. Also, no red monsters. There were discounts offered by the pattern designers featured on the recommended patterns list, and the response to this has just been amazing. I used a couple patterns by Rebecca Danger who was offering 60% discounts on her patterns. It's been fun watching people all over the country knit monsters for these children and fun connecting with them on this level. This has really been an interesting learning experience for me. I'm very happy to have been a part of it!
I'm hoping the friendly little guys I made will make some children very happy and provide some comfort. Meet Hayworth (the blue guy) and Nora and Nola (the momma and baby monsters). I used a couple of the recommended patterns because I wanted to be safe on that front, but I added some little flairs that were all my own in the form of embroidered felt medallions. I've also been looking for any excuse to embroider so here it is.
We only have until January 31 to mail monsters, so crafters may not have time enough to make and mail, but there is a wish list on amazon that anyone is more than welcome to purchase from and have sent to the meet point.
So, on that note, may everyone stay safe, hug your children (nieces, nephews, grandkids, etc.) and say a prayer for a hurting community. Lots of love from the knitting community (well, at least me).
There were a few guidelines for crafting, some of which I wouldn't even have thought of. For example, no x's for eyes. It totally makes sense when you think of it in context, but it's such a common crafting technique. Also, no red monsters. There were discounts offered by the pattern designers featured on the recommended patterns list, and the response to this has just been amazing. I used a couple patterns by Rebecca Danger who was offering 60% discounts on her patterns. It's been fun watching people all over the country knit monsters for these children and fun connecting with them on this level. This has really been an interesting learning experience for me. I'm very happy to have been a part of it!
I'm hoping the friendly little guys I made will make some children very happy and provide some comfort. Meet Hayworth (the blue guy) and Nora and Nola (the momma and baby monsters). I used a couple of the recommended patterns because I wanted to be safe on that front, but I added some little flairs that were all my own in the form of embroidered felt medallions. I've also been looking for any excuse to embroider so here it is.
We only have until January 31 to mail monsters, so crafters may not have time enough to make and mail, but there is a wish list on amazon that anyone is more than welcome to purchase from and have sent to the meet point.
So, on that note, may everyone stay safe, hug your children (nieces, nephews, grandkids, etc.) and say a prayer for a hurting community. Lots of love from the knitting community (well, at least me).
Monday, December 31, 2012
Encouraging Myself to Do the Laundry the First Day...
I have the curse of having a laundry room that is slightly out of the way (it used to be part of the garage), and I don't always hear the beepers when they go off signalling the laundry's done. Oh, yeah, and also I hate doing laundry. So there's that. In any case, it's impossible for me to do one load of laundry in a day, let alone the 3 or 4 or 5 that need to be done. So I made myself something pretty to try to encourage me to do the laundry when it's supposed to get done, as opposed to pulling clean clothes out of the dryer as we need them. :)
I bought myself a little wooden sign from Hobby Lobby and this very cute blue-washed wood-looking paper to decoupage onto the sign. The only problem was when I put the barn wood paper on top of the brand new wooden sign, the visuals didn't quite line up. So then I had to attempt to age the wooden sign. In one night. It's actually not that hard. :) Google has some pretty amazing information hidden away. It's like magic or something. I bought some steel wool and soaked it in about a half cup of white vinegar overnight. Then I brushed it on the wooden sign the next day, and, after 3 coats, voila! Instant aging. :) Maagiccccc...
It took a couple days to air out, but I was really happy with the result. After the decoupage with the barn wood paper, it actually looks like it was a barn wood sign. I added a cute 'launderette' sign, some ribbon and some stamps (I used Staz-On ink as it will literally stamp a permanent image onto anything), and I was mostly good to go. But I wanted something that I could see from the other side of the house that would tell me if I still had clothes in the dryer and I had to get my butt off the couch and go fold them. Enter the miner's coins.
I'm pretty sure we've all seen October Sky (as old as it is for a movie these days), and I've always loved the idea of those miner's coins that indicate which miners went underground for the day. I had some metal tag rings lying around so I found some icons for washer and dryer to hang in the middle of the rings. That way, I'll know if there are clothes in the washer or dryer (or both), and I can see these rings from across the house. You'd be amazed at how quickly I forget things. I need to remind myself of these things occasionally. :) So I just hang the washer coin on the sign when I put clothes in the washer and so on and so forth. I also made a little quickie pocket for the backside of the sign so I can store the coins there and they won't get lost when they're not in use.
I know it's not the prettiest thing you've ever seen, but it's the back of the sign, for Pete's sake. I also did some stamp testing there. No one's going to see it. :) So now I have this cute little sign that will tell me when to do the laundry. At least I'm pretty sure my husband's hoping his days of pulling clean clothes out of the dryer are over. :) Happy New Year!
I bought myself a little wooden sign from Hobby Lobby and this very cute blue-washed wood-looking paper to decoupage onto the sign. The only problem was when I put the barn wood paper on top of the brand new wooden sign, the visuals didn't quite line up. So then I had to attempt to age the wooden sign. In one night. It's actually not that hard. :) Google has some pretty amazing information hidden away. It's like magic or something. I bought some steel wool and soaked it in about a half cup of white vinegar overnight. Then I brushed it on the wooden sign the next day, and, after 3 coats, voila! Instant aging. :) Maagiccccc...
It took a couple days to air out, but I was really happy with the result. After the decoupage with the barn wood paper, it actually looks like it was a barn wood sign. I added a cute 'launderette' sign, some ribbon and some stamps (I used Staz-On ink as it will literally stamp a permanent image onto anything), and I was mostly good to go. But I wanted something that I could see from the other side of the house that would tell me if I still had clothes in the dryer and I had to get my butt off the couch and go fold them. Enter the miner's coins.
I'm pretty sure we've all seen October Sky (as old as it is for a movie these days), and I've always loved the idea of those miner's coins that indicate which miners went underground for the day. I had some metal tag rings lying around so I found some icons for washer and dryer to hang in the middle of the rings. That way, I'll know if there are clothes in the washer or dryer (or both), and I can see these rings from across the house. You'd be amazed at how quickly I forget things. I need to remind myself of these things occasionally. :) So I just hang the washer coin on the sign when I put clothes in the washer and so on and so forth. I also made a little quickie pocket for the backside of the sign so I can store the coins there and they won't get lost when they're not in use.
I know it's not the prettiest thing you've ever seen, but it's the back of the sign, for Pete's sake. I also did some stamp testing there. No one's going to see it. :) So now I have this cute little sign that will tell me when to do the laundry. At least I'm pretty sure my husband's hoping his days of pulling clean clothes out of the dryer are over. :) Happy New Year!
Labels:
aging wood,
crafting,
decoupage,
diy,
home crafting,
home decor,
homemade,
laundry sign,
ribbon,
wood
Subscribe to:
Posts (Atom)