Tuesday, April 2, 2013

Easy Spring Placemats

I have finally gotten tired enough of the weather where I am now trying to do everything in my power TO FORCE SPRING UPON US. I'm tired of this cold weather, already. So I found some beautiful springy fabric, made up a super easy sewing pattern, and I ended up with 4 reversible cheerfully spring placemats for our table. Yay!

Easy Spring Placemats (makes 4 placemats)

Finished measurements: 15" x 15"
Seam Allowance: 1/2" (unless otherwise stated)

 materials
*pattern fabric A:  6" x 16" (x4)
*pattern fabric B: 6" x 16" (x4)
*solid-colored fabric: 6" x 16" (x16)
*2 coordinating colored threads

steps

1.  Always prewash fabric!

2. Cut fabric to sizes specified in materials list. Make sure all pieces are pressed.

3. Lay down fabric A and a solid color RS together. Sew down one long side. Press open.

4. Lay down solid-colored fabric piece on top of previously sewn fabric A RS together. Sew down the other long side. Press open.
5. Follow steps 3-4 again for fabric B and the solid-colored fabric. Now you have 2 square pieces of sewn fabric.

6. Lay them down RS together with one of them turned 90° (so the patterned fabrics form a cross on top of each other). Sew all the edges leaving 2-3" for turning inside out.

7. Clip all corners, turn placemat inside out and press.

8. This is where it gets fun! I chose a chartreuse thread to show on the blue side and a blue thread to show on the chartreuse side for some decorative flair. With that in mind, I sewed 1/4" all around the edge to finish off the seam.

NOTE: When I was sewing with the chartreuse fabric facing up in my sewing machine, I had the blue thread in the top of my machine, and the chartreuse thread in the bobbin (so it shows up on the underside with the blue fabric). 
9. To finish it up, I "stitched in the ditch" on both sides, which created a 3x3 grid on each side of the placemat.

NOTE: When I was sewing with the chartreuse fabric facing up in my sewing machine, I had the blue thread in the top of my machine, and the chartreuse thread in the bobbin (so it shows up on the underside with the blue fabric). This means when I flipped the placemat over to "stitch in the ditch" on the other side, I had to switch the thread colors in the machine so chartreuse was on the top of the machine and blue was in the bobbin.

And now spring is starting to show up a bit. It's even warmed up outside! I'll take credit for that. :) Come back later for instructions on making the lovely quilted table runner in the center with the scraps! Happy Crafting!

Tuesday, March 26, 2013

Knits for Books

And by books, I mean my Kindle, of course. I never thought I would really get into it (because I'm a ginormous bookworm), but the rare occasion now is when I read an 'actual' book. Funny how these things turn out sometimes.

In any case, my moods tend to change very quickly (just ask my husband), and I like to be able to change my gadget cases whenever I like right along with them. However, I also have very particular tastes so, despite the fact that I have actually found 1 other Kindle case I liked, it's more than I care to spend right now so I can't lose by making a case myself. I had the yarn already, and the pattern was free. Yahtzee!

I got the pattern (by Jayne Hayward) off Ravelry (as I so often do) for free. It is a ravelry download, though so if you're interested, and you're NOT part of Ravelry, you need to join in order to download it. Heck, join anyway. It doesn't cost anything, and it's fiber crafting heaven, if you're into that kind of thing.
One new ridiculously complex cast-on method and several hours later, I have my new cover for my old baby. :) I used merino wool for this one, and this is the first time I've ever blocked wool so I WAS VERY CAREFUL. I did all this hard cable work, and I did NOT want to felt this. So I had to be extra careful. I found a very good tutorial by Mandy Powers of ZigZag Stitch that tells you everything you need to know to block your wool without taking you off the deep end. Short and to the point. :)

And here you have the finished product. Blocked and beautiful. Now my most beloved 'book' can be as cozy as I usually am right before I rip its case off to read it.

Thursday, March 21, 2013

Giving New Life to Old Chairs

Dumpster chairs, even. Scott and I were moving out of our apartment and found these wonderful bar chairs just sitting by the dumpster on our way out. There was nothing wrong with them, and they were free. I'll take 'em! That was 7 years ago, and they're still going strong, especially with my latest project.
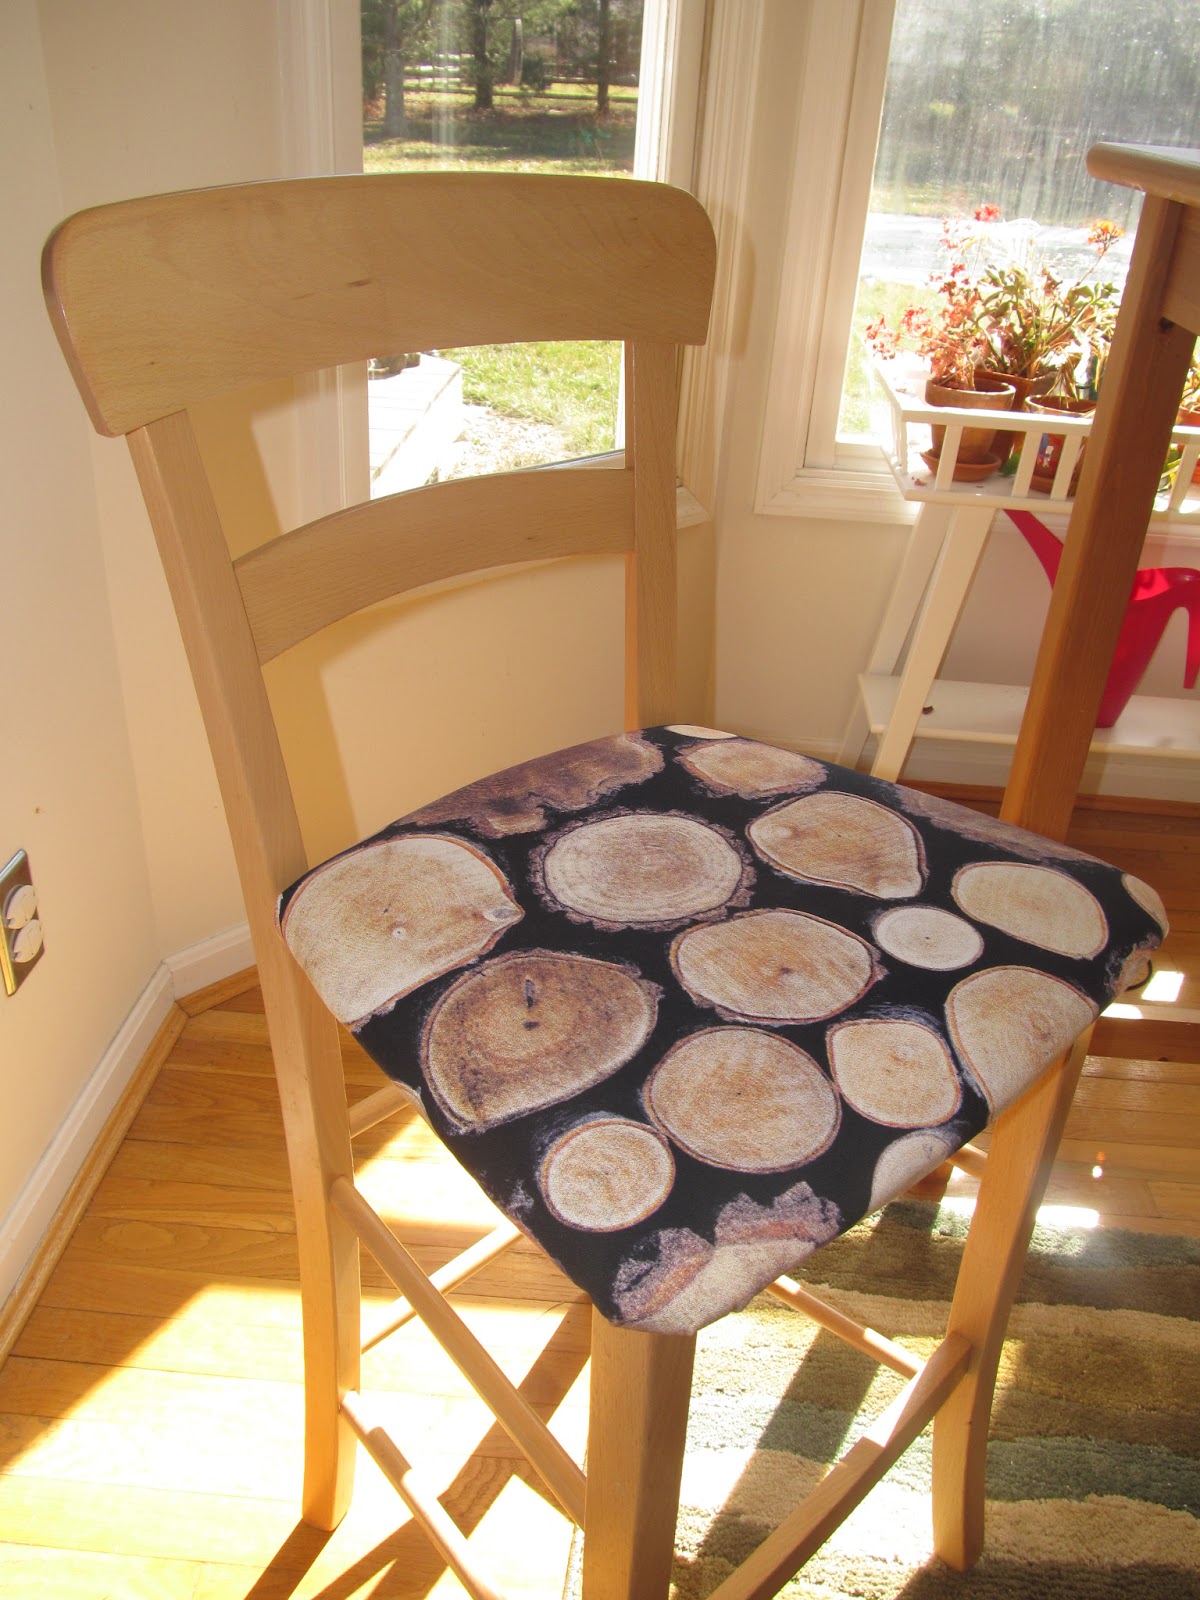
This was the poor state of them before this week. I bought a yard of home decor weight fabric (love this log cross section fabric!) from IKEA (always measure your surface; I have some extra for a fun project later...), and had some fabric stabilizer and a staple gun standing by.

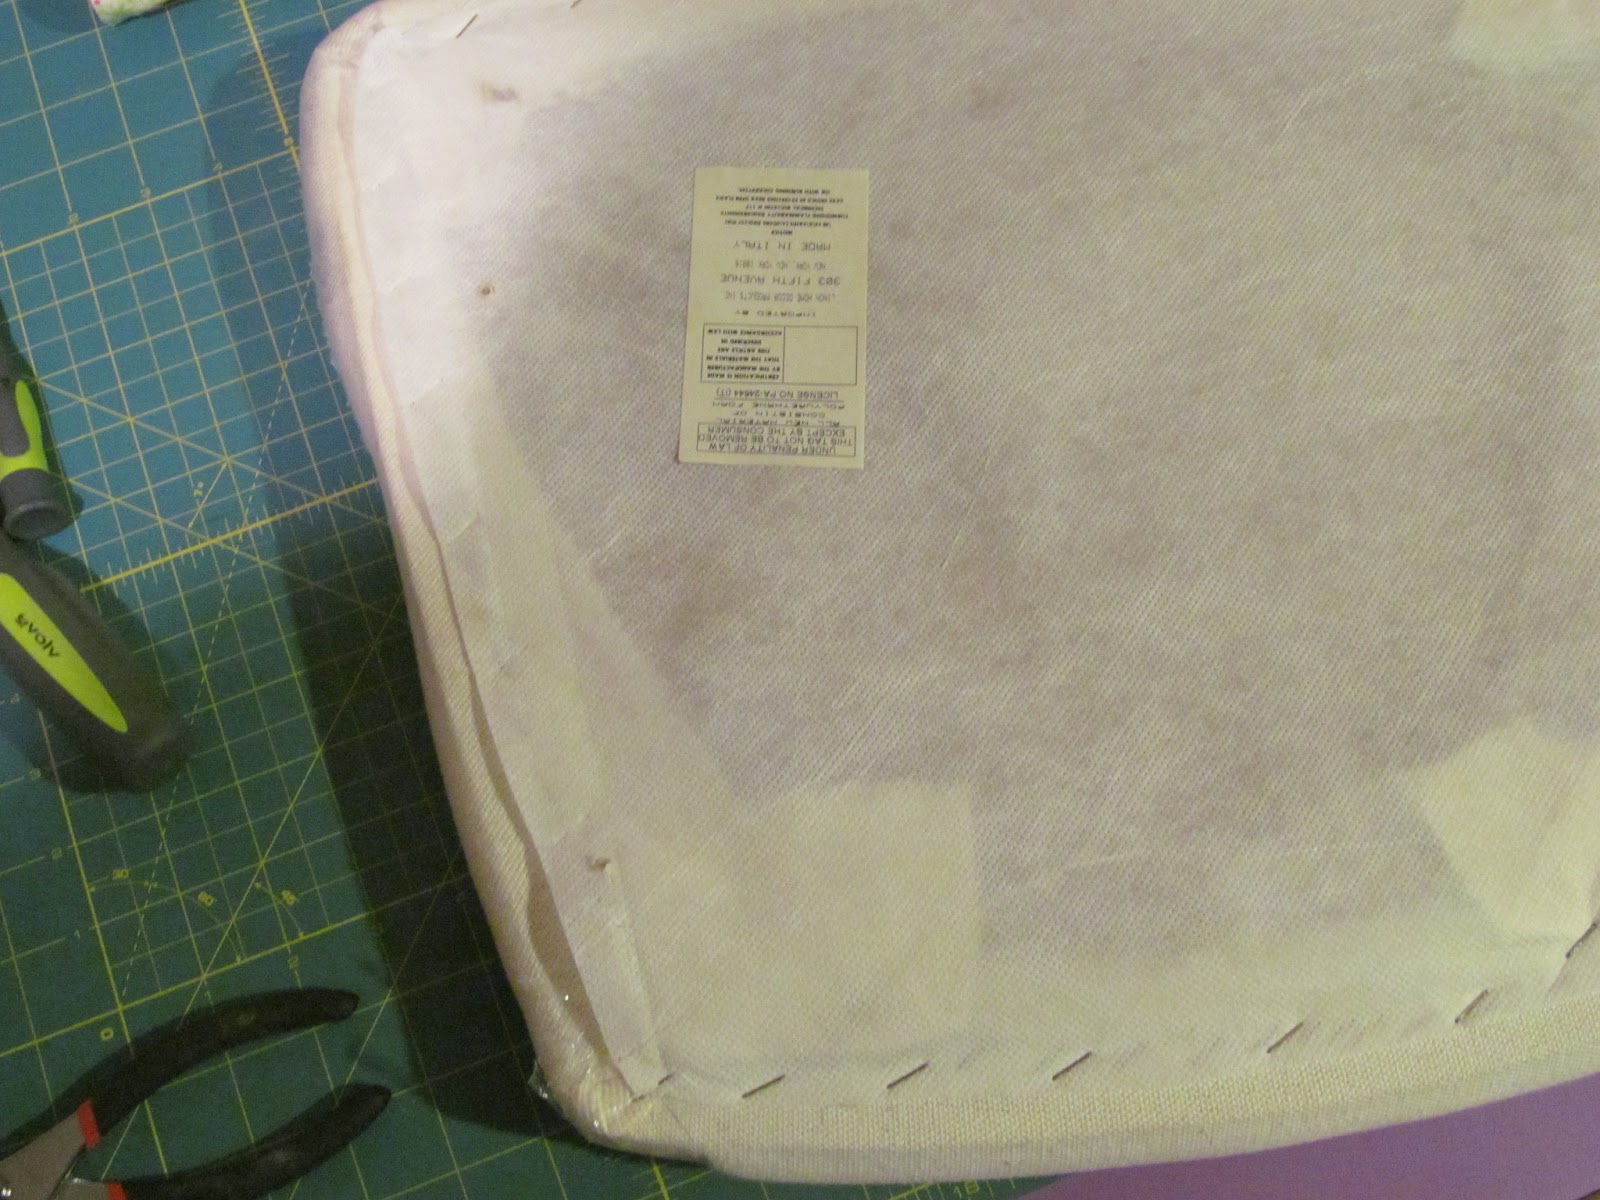
I started by detaching the seat from the frame and beginning the long task of removing the staples from the fabric.
It was a giant pain in the butt, but with a standard screwdriver and a pair of pliers, I was able to get it done. I kept the seat fabric to measure for the new seat. I ironed the old seat so it would lay flat for measuring and cutting. Now you can REALLY see why this needed to be done. :) Cut around the old seat, and you have your new one! You probably don't have to do this, but I'm kind of anal-retentive and want everything to be perfect so I did a quick blanket stitch around the outside of my new seat fabric to prevent fraying.
Luckily, my old seat's foam padding was just fine so I didn't have to replace that. Now I'm ready to staple the new fabric!
 I started at the back of the seat and started stapling from the middle. That way you can work in to the corners and get them the way you want them. I noticed when I was undoing the old seat fabric that there was a sort of plastic stabilizer so I decided to use some fabric stabilizer I had on hand. Just to keep the staples from pulling the fabric. It was around $7.99 for 10 yards, and I already had it. It seemed like a good idea. :)

I tried to work all 4 corners to be as flat as I could manage, and they all had extra stapling. It was more trial and error than anything. I had to take out staples a few times to rewrap. At this point, while you're wrapping, it might also be a good idea to mark the existing screw holes on your fabric so you don't staple them and so you know where they are for reattachment. I didn't mark them, but everything worked out fine.
When I was done wrapping the seat, I realized I didn't get enough fabric for the bottom cover. So... I decided to use the old seat fabric. :) I cut it using the old bottom as a template, and I, of course, had to do a little moving around to get it in a good spot that didn't have holes in it. I also turned it over so the side of the fabric that was facing out before was now to the inside of the seat. I also did a quick blanket stitch around this piece of fabric because it's more important that this one doesn't unravel and look unsightly. Then, staples all around, and voila!
Reattach it to the frame, and you're golden. Now we have our brand new old dumpster chairs. For the cost of free + $7.34 for the fabric, these chairs couldn't have been a better investment. :) Happy Crafting!

Wednesday, March 20, 2013

Adventures in Chalkboard Paint

I have ALWAYS wanted to use chalkboard paint. I see it on the DIY network, Martha Stewart crafting ads (I get her craft a day newsletter) and in various Michael's or JoAnn's crafting project ideas. So now it's my turn! Unfortunately, I did not end up getting Martha Stewart's chalkboard paint as it was 2 ounces fewer for $1 more. I got the folkart brand (a very well-known acrylic paint brand), and it worked just fine. I imagine there's only so much that can go wrong with paint so I didn't even think about it. Anyway... on to the project!

We have some baking ingredient jars on our counter, and they needed a little jazzing up. Plus, I always have to look really closely to distinguish the flour and sugar. It sounds stupid, but it's a problem for me. I'm blind as a bat. I bought some pre-cut balsa wood circles (3.25" diameter) for $0.29 each to fit the lids of my kitchen jars. I got my chalkboard paint for $6.99. I used contact paper to mask off a slightly smaller circle in the middle of each balsa piece, and then I just painted 6 or 7 coats of the chalkboard paint. The balsa really soaked up that paint so it took a couple days for me to get all my coats on. I adhered each circle to the lid with 3-D glue dots so they can be removed (if necessary, but they probably won't) but the intention is for them to stay there forever. I like to plan my options.
This was a really quick and easy project that you could do for any room. I painted a couple extra chalkboard labels to use in my craft room. Now I can change out the contents of each jar, or, as is the case with my granola (maple pecan here... yum...), I can get different flavors. And I will never mistake the flour for the sugar again.
 Now... how else can I use my chalkboard paint...?

Monday, March 18, 2013

Joey's New Bedsheets

I have finally finished that poor boy's sheets. He's had the same 2 sets of bedsheets for over 3 years, but no more! I thought, "Hey, how hard could it possibly be to make a sheet. It's a flat piece of fabric with some corners in it." It turns out, it wasn't that hard, it was just kind of a pain in the butt. The great part about the process, though, was that I got to take Joey to the store with me so he could pick out whatever pattern he wanted. We both had a good time with this part.

The first set of sheets I made was made from some Cars fabric Joey picked out. If you missed it the first time, the pillowcase pattern can be found elsewhere on my blog HERE. Super easy stuff, and it took me about 20 minutes to make.
The second set of sheets we made (I say we because he's a very good helper and would want credit, I'm sure), was made from some dump truck fabric he picked. Now, I couldn't stand to make an entire bedsheet out of the super busy dump truck pattern so I made the pillowcase using the dump truck fabric and picked out a coordinating fabric for the actual bedsheet. You'll see what I mean in a second. I made this pillowcase the exact same way with the exception of the added grosgrain ribbon embellishment. I took that out and used some decorative stitching on the outer hem to have a little fun with my new sewing machine. :)
You can't see it very well in this picture, but the bedsheet is a fabric with all sizes of grey circles. I thought it looked like rocks all piled up, and it goes really well with his pillowcase. And also, he's a hammy turkey. :)

So, now to get down to business! The pattern I used for the bedsheet can be found HERE. The guys at Michael Miller Fabrics did an amazing job with this pattern as it was very easy to read and complete. I did, however, need to make some changes to suit my own needs. For Joey's bedsheet (please be sure to measure your mattress!), I had to add 2" to the length. On the other hand of that, the pattern calls for 45" in fabric width, and I did just fine with 42". I couldn't find anything at JoAnn's that had 45" length.

I also decided to use 3/8" elastic as the 1/4" they suggest looked way to flimsy when I went to buy it in the store. I wanted a little extra strength assurance. That also changed the hemming measurements: I folded the hem over a full 1" and then folded back under 1/4" (same in the pattern) in order to fit the wider elastic. It is always suggested that you leave 1/4" on each side of your elastic track. So if your elastic is 3/8" wide, you need a track that is 7/8" wide. I was short about an 1/8", but with my bodkin and my super-savvy threading skills, it worked just fine.

I always encourage you to make your decor your own, and this is a really easy way to do it. Don't let it intimidate you! I do get a little overwhelmed by my crafts sometimes, but, if I just sit down and do it, everything works out just fine. And if it doesn't, you can always give it as a gift. ;) I'm looking forward to getting to make Rosie's sheets when hers start to get old. :) Happy Crafting!
Saturday, March 16, 2013

I Have a New Work Table!

Yes! I have a brand new work table made by none other than my wonderful husband. He made it for me for my birthday, and it's finally been installed! It folds up against the wall for storage. Lucky for him, though, I don't EVER intend on folding it away. There will undoubtedly always be SOMETHING on it. :)
Here we have my lovely model, Joey showing off its wonderful table-ness. It holds things, like tupperware bowls, on its surface wonderfully. It is also a good place at which to sit. Scott painted it my favorite color (purple!), and, my personal favorite detail, added decorative exposed screw heads. Beautiful!
And here we have me in my usual crafting position. That is to say crouched over just asking for back pain but enjoying myself immensely! So here's to a wonderful husband who is incredibly talented in the work shop. In making me this wonderful crafting table, he has unknowingly added some more items to his work list. :) Happy Crafting... and Happy Birthday to me!


Monday, January 28, 2013

Update Your Mangy Ironing Board

Okay, so maybe your ironing board cover isn't mangy, but mine certainly was. So I fixed it.
How do these things get so dirty, anyway? I've never ironed anything but clean clothes. Anyway, here's a nice easy, maybe a little dirty, tutorial for you to use when you'd like a little change on the ironing board.

Ironing Board Cover Tutorial

Materials:
* Measure your ironing board to get an idea of how much fabric you'll need.  Mine is 56" long so I just got 2 yds.
*1/8" cord
*toggles for the cord
*coordinating thread
*ruler
*water soluble pen

Remember to always wash your fabric before sewing.

1. Remove current board cover and inspect underlayment to make sure it’s still usable. If it’s not, you’ll have to get something to replace it. Mine was foam, and it's fine. Awesome.

 2.  Lay fabric down on top of your ironing board facedown making sure to leave a few inches around the edge of the fabric. Trace around the ironing board with your marker.
  • If you wanted to make a paper pattern that you could use whenever you wanted, you could do that, too. The following steps will be the same, you'll just use paper.
3. Lay your fabric down again (right side down again) and mark around your traced pattern at 3”. This will give it room to hang down around the ironing board and for you to make your casing for the cord. 
4. You can connect the lines if you want (I did). I know it’s a weird shape, but if you spaced your 3” marks close enough together, it’s just like connecting the dots. Cut out the shape.

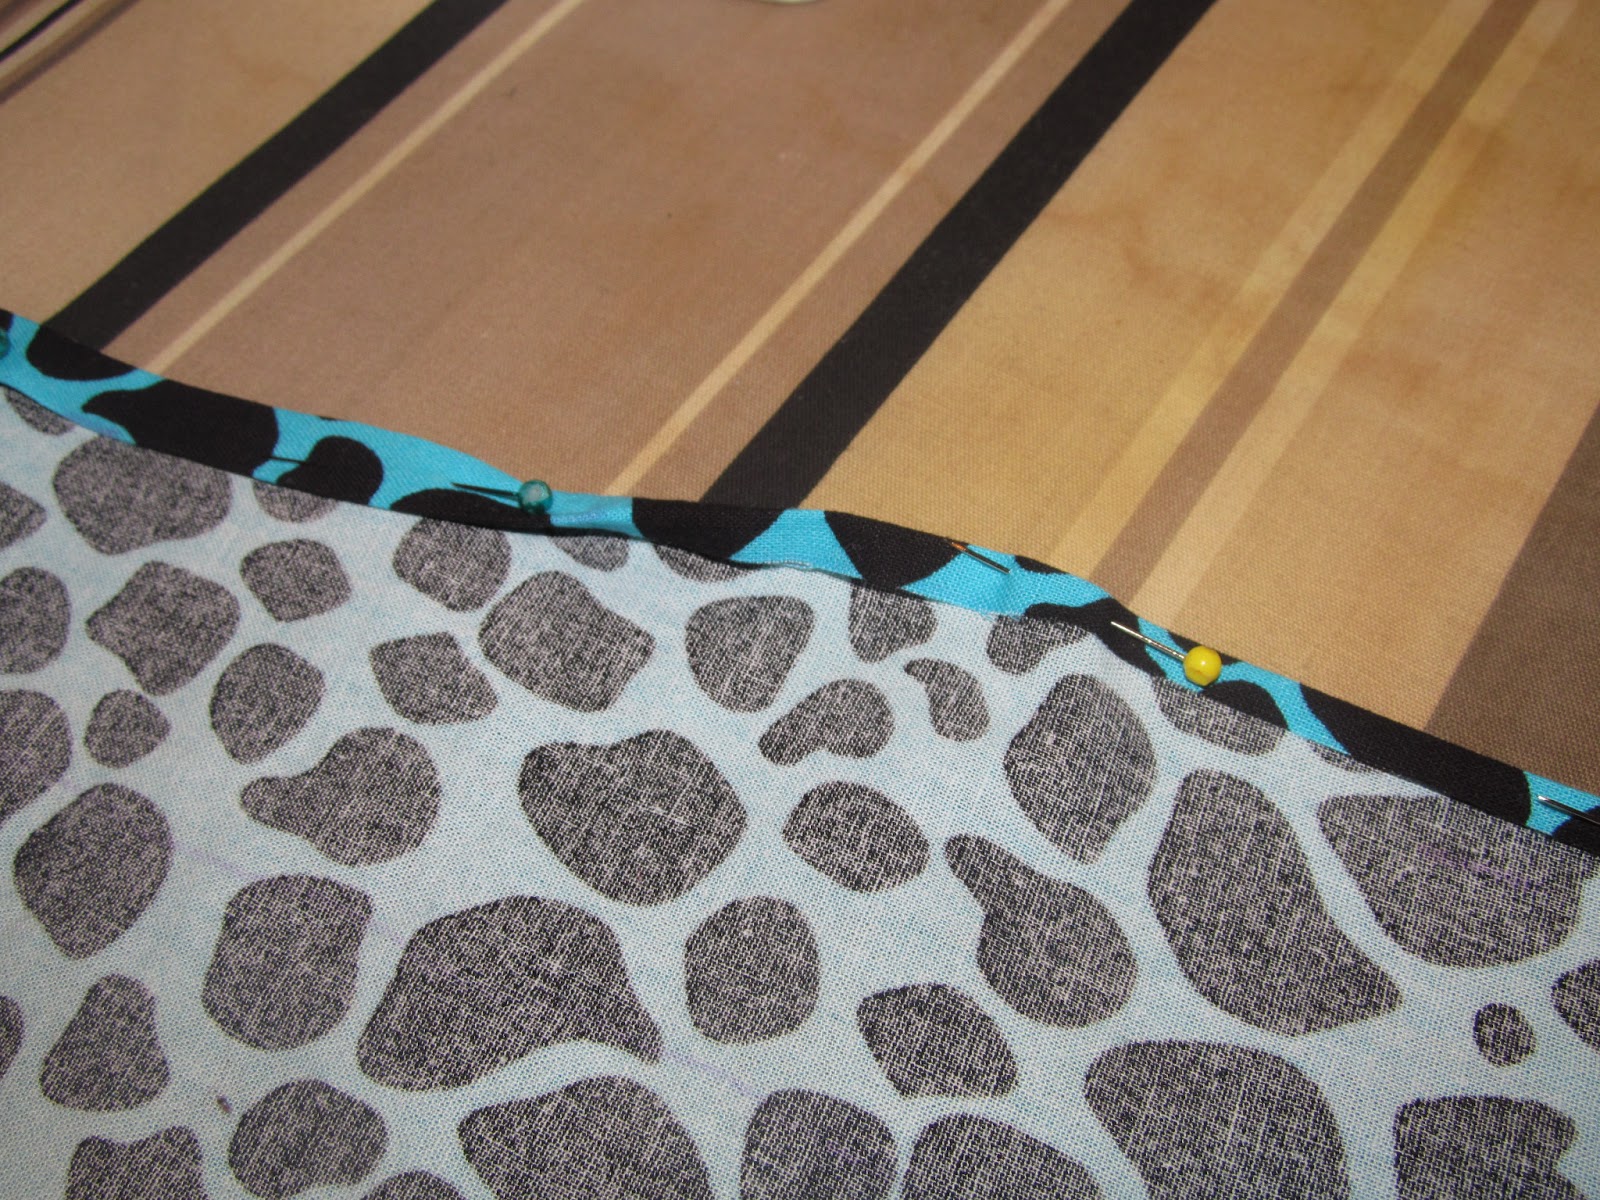
5. Place the fabric right side down. Mark in at ¾”. Mark in and pin/press at ¼”.

6. Pin/press again at the marks you made at ¾”. Yes, you will have some gathers around the corners, but just press them down (hospital corner style) and sew right on top of them. 
  • You can see where I've already pressed and pinned the 1/4" section (on the right side of the photo). Then I went back and folded the fabric again to the 3/4" marks (on the left side of the photo).
7. Mark a 1” space at the very point of the pattern for a spot where you can insert the cording. Do not sew this part closed!

8. Sew as close to the inside pressed hem as possible. I always like to press my hems when I'm done so they look nice so you can do that, if you'd like.
9. Attach a safety pin (or elastic threader) to the end of your allotted cord length and thread it through the casing where you left your opening. Make sure you’re threading the cord through the casing entirely. That probably means you’ll have to go back and straighten out the fabric where’s it's bunched up because of the cord going through it. This will make it easier to tighten it at the end.

10. Put your cover on your ironing board and pull the cord tight making sure the cover surrounds the board on all sides evenly so you don’t have any weird bunches or wrinkles.

11. Thread the toggle on the exposed cord on the end and tighten it to bring the cover very close up around the board. 
12. Step back and admire. Maybe have a drink. Mmmm... drinking and sewing...
Everyone needs some teal giraffe print in their lives. Happy Crafting!